
Decodable SwiftData
A proof-of-concept for building offline-first iOS apps with Codable conforming models
Build a real-time chatroom with Vapor and SwiftUI using WebSockets

Many associate Swift exclusively with mobile app development, often overlooking its potential on the server. The other day I thought, “Why not treat Swift like JavaScript/Node.js and use it server-side?” The truth is, Swift has been used on the server for many years. It has a rich ecosystem that includes the Vapor web framework and has an active developer community.
One thing I like about Node.js is the ease of building real-time apps with WebSockets (WS), explicitly using the socket.io framework. Building a simple chat room app with node, React (or whichever client-side JS framework you prefer) and socket.io is a breeze.
Let’s mix it up a bit.
For a fun intermediate project, let’s try building a simple web server using Vapor and an iOS client using SwiftUI to connect via WebSockets.
In addition, we’ll try the new Observation framework, which sounds very cool and could help clean up a lot of fluff in our codebases.
Build a super minimal chatroom that enables messages sent from one connected client to appear in all connected clients.
Set up a way to differentiate between sender and receiver clients. For example, in iMessage, messages you send appear on the right side of the UI with a blue background, and messages you receive are displayed on the left side of the UI with a grey background. For real-world chat, this is an essential feature, but I am semi-lazy, so maybe we’ll add this in at a later time…
It’s also important to note that this POC may not necessarily adhere to best practices nor be totally thread-safe. It is a prototype after all.
If you want to skip all this and look at the code, or if you want to follow along, clone the repo: https://github.com/drewalth/swift-chatroom.
For the sake of brevity, I’m going to say “Refresh the app” quite a bit. This means selecting a scheme, either SwiftChatroom or App, and press cmd + r or build and run. Example, “Refresh the server” or “Refresh the iOS app”.
Okay, disclaimers over. Let’s jump in!
First, head over to https://vapor.codes/ and follow the installation instructions.
Let’s create a workspace to help keep things organized. Create a new folder called swift-chatroom and navigate into the directory.
mkdir swift-chatroom && cd swift-chatroomOpen Xcode and go to File -> New -> Workspace. And create a new workspace called swift-chatroomin the swift-chatroom/ directory you just created.
Now, create the Vapor server.
vapor new server -nIn Xcode, add the server to the workspace. File -> Add Package Dependencies -> Add Local , select the new server directory and click open. It will take a second for Xcode to load all the other dependencies of Vapor. Once complete, Refresh the server.
Next, create the iOS client. File -> New -> Project . Select iOS, call it “SwiftChatroom” and add the project to the swift-chatroom workspace.
Select the SwiftChatroom scheme and run the app on the simulator of your choosing. To test the incoming message broadcasting, from Xcode run the app in a different simulator. Only one will have debug logging n’ things, but that’s okay for now.
Let’s verify that the iOS app can communicate with the server. First, make a few small changes to the /hello route. Open Packages->server->Sources->App->routes.swift. Here, create a new structure called Greeting.
struct Greeting: Content {
    var message: String
}
And change the generated “hello” handler to this:
app.get("hello") { req async -> Greeting in
      Greeting(message: "Hello world!")
}
Refresh the App.
Now, in the iOS app, open ContentView.swift, add a State variable to store our decoded message.
@State private var message: String = ""Replace the placeholder “Hello world!” in the Text view with our state variable. The VStack should look like this:
VStack {
    Image(systemName: "globe")
        .imageScale(.large)
        .foregroundStyle(.tint)
    Text(message)
}
Cool. Now, let’s write our HTTP request and call the server. Add a Greeting struct to match the response returned by the server and a function called fetchGreeting.
func fetchGreeting() async throws -> String {
    // Create the URL
    guard let url = URL(string: "http://localhost:8080/hello") else {
        throw URLError(.badURL)
    }
    let session = URLSession.shared
    // Make an async request
    let (data, response) = try await session.data(from: url)
    // Check for HTTP response and status code
    guard let httpResponse = response as? HTTPURLResponse, httpResponse.statusCode == 200 else {
        throw URLError(.badServerResponse)
    }
    // Decode the response
    return try JSONDecoder().decode(Greeting.self, from: data).message
}
struct Greeting: Decodable {
    let message: String
}
Call this function in a .task modifier on our VStack:
.task {
    do {
        self.message = try await fetchGreeting()
    } catch {
        print(error)
    }
}
Refresh the apps. If everything works as expected, you should see something like the UI from the generated boilerplate code on project creation…
Awesome! Now that our server and client are talking to each other let’s set up our chatroom.
To test this using a physical device, complete the following steps below. If you plan on using simulators only, skip the “Physical Device” bullets listed below.
Info.plist. Add the “App Transport Security Settings” dict, and in that, add “Allow Arbitrary Loads” and set to “YES”.serverHost to this value.Heads up for physical device folks: if you get “Connection refused” errors when running the app, check to see if your Firewall allows your dev machine to accept incoming connections. See Settings.Network.Firewall.
Okay, now let’s set up our web socket. Vapor has built-in support for this which is pretty neat.
Open the routes.swift file and add the following “chat” route/socket that sends a message to the client when connected.
//  app.get("hello") ...
app.webSocket("chat") { req, ws in
    ws.send("Connected!")
}
Sweet! Now, we’ll set up the client-side stuff n’ give it a whirl. If you plan on testing this out with a physical device, edit the App scheme Run arguments to ensure your Vapor server is binding to 0.0.0.0 so it can accept connections from any IP address.
When you start your Vapor server, make sure you’re using:
vapor run serve --hostname 0.0.0.0Or, if you’re not using the Vapor toolbox:
swift run Run serve --hostname 0.0.0.0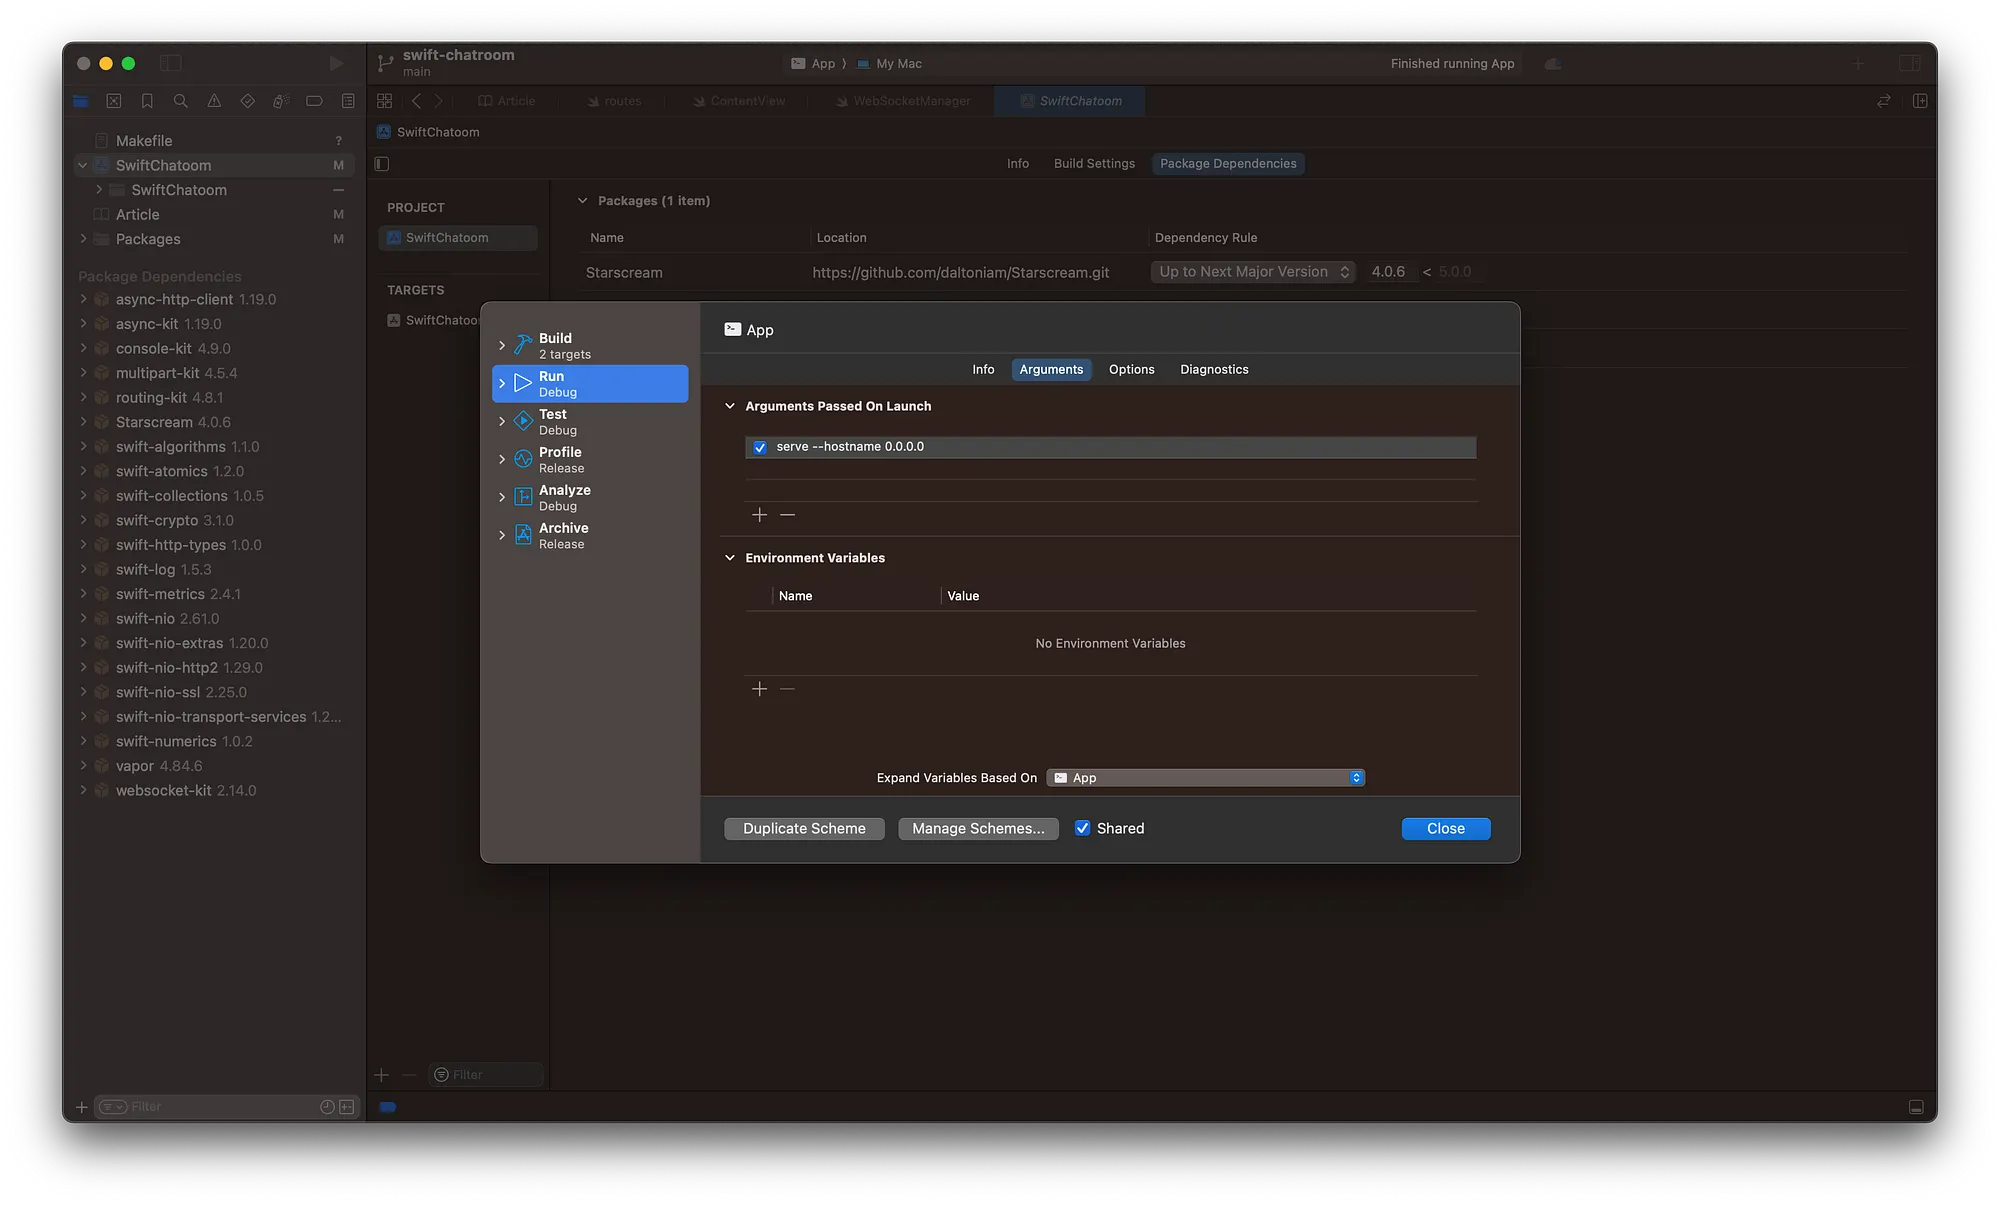
In this POC we’ll use Starscream to communicate with the server. Add Starscream as a package dependency:

Next, we’ll add an Observable class to interface with the server. Create a new Swift file called WebSocketManager and paste in the following:
import Starscream
@Observable
class WebSocketManager {
    /// Replace this value with your machine's IP address
    /// if you want to test using a physical device.
    private var serverHost = "localhost"

    private var socket: WebSocket!
    var isConnected = false
    var messages: [String] = []
    init() {
        setupWebSocket()
    }
    private func setupWebSocket() {
        var request = URLRequest(url: URL(string: "ws://\(serverHost):8080/chat")!)
        request.timeoutInterval = 5
        socket = WebSocket(request: request)
        socket.delegate = self
    }
    func connect() {
        socket.connect()
    }
    func disconnect() {
        socket.disconnect()
    }
    func send(_ message: String) {
        socket.write(string: message)
    }
}
extension WebSocketManager: WebSocketDelegate {
    func didReceive(event: Starscream.WebSocketEvent, client: Starscream.WebSocketClient) {
        switch event {
        case .connected(_):
            DispatchQueue.main.async {
                self.isConnected = true
            }
        case .disconnected(_, _):
            DispatchQueue.main.async {
                self.isConnected = false
            }
        case .text(let string):
            DispatchQueue.main.async {
                self.messages.append(string)
            }
        // ... handle other cases as needed
        default:
            break
        }
    }
}
Next, connect the WebSocketManager to the UI and create a more chatroom-like design. Replace the ContentView struct with this:
struct ContentView: View {
    @State private var webSocketManager = WebSocketManager()
    @State private var message: String = ""
    var body: some View {
        VStack(spacing: 20) {
            List(webSocketManager.messages, id: \.self) { msg in
                Text(msg)
            }
            HStack {
                TextField("Enter message...", text: $message)
                    .textFieldStyle(RoundedBorderTextFieldStyle())
                Button("Send") {
                    webSocketManager.send(message)
                    message = ""
                }
            }
            .padding()
        }
        .onAppear {
            webSocketManager.connect()
        }
        .onDisappear {
            webSocketManager.disconnect()
        }
    }
}
Heck yeah. We’ve done a lot for the client, but our server isn’t very capable. Let’s flush it out a bit.
So far our server is only capable of notifying the client when it is connected. Next, we’ll add the ability to broadcast messages. To do this, we first need to keep track of all connected clients. In routes.swift, add this new variable outside of the func routes() scope.
var connectedClients: [UUID: WebSocket] = [:]Now replace the app.webSocket("chat") handler with this:
app.webSocket("chat") { _, ws in
ws.send("Connected!")
// Generate a unique ID for the connected client
let clientId = UUID()
// Add the new WebSocket connection to our dictionary
connectedClients[clientId] = ws
// Handle when a client disconnects
ws.onClose.whenComplete { _ in
connectedClients[clientId] = nil
}
// Listen for messages from the client
ws.onText { _, text in
// Broadcast the message to all connected clients
for client in connectedClients.values {
client.send(text)
}
}
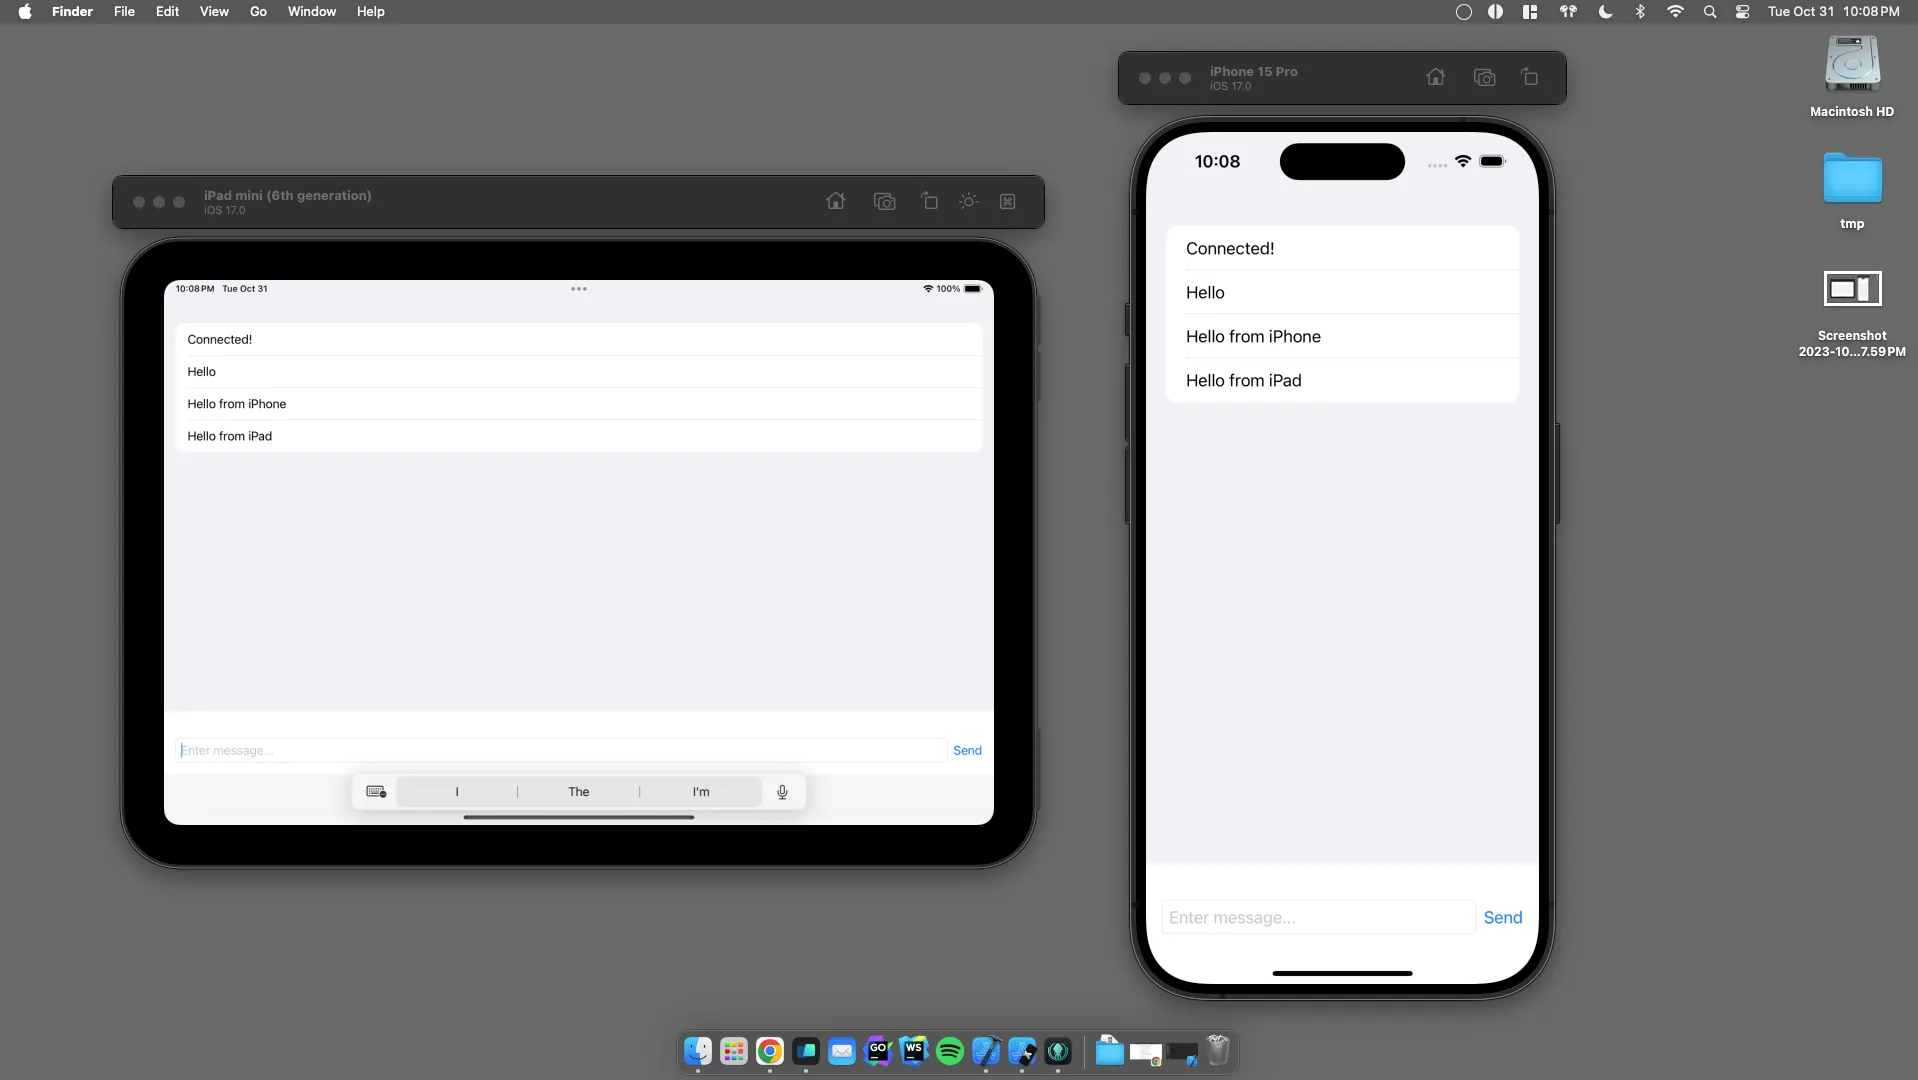
}Alright. Now, let’s try running everything all together. Refresh the server then refresh all the clients, physical or simulated, and try sending some messages! If everything is working as expected, you should be able to send a message from one client and immediately receive it in all the others.
In conclusion, I’m really impressed with how easy it was to set this whole thing up.
However, like Node.js, it will take some time before server-side adoption is more prevalent in the community. Like every other language or framework, each has its use cases. This prototype illustrates how easy it is to create a real-time iOS app and server using only the Swift programming language — a self-categorized client-side-exclusive language.
I hope you found this project enjoyable and gets the wheels spinning for your next project!
Cheers!
A proof-of-concept for building offline-first iOS apps with Codable conforming models

A protocol-oriented approach to HTTP networking in Swift using async/await, dependency injection, and proper error handling

Build a real-time chatroom with Vapor and SwiftUI using WebSockets